As an Amazon Associate, I earn from qualifying purchases
how to sew a patch on a backpack
Knowing how to sew a patch on Anyone who wants to travel should have a backpack personalize or repair their favourite bag. Adding a patch can give your backpack a unique and personalized look, making it stand out. Additionally, sewing on a patch can help to cover up any holes or damage, extending the life of your backpack.
By learning how to sew a patch on correctly, you can ensure that it is securely attached and will withstand the wear and tear of everyday use. This skill can also be helpful for anyone who enjoys DIY projects or wants to add a personal touch to their belongings.
Why need to sew a patch on a backpack?
Personalization: Adding a patch to your backpack can give it a unique and personalized look, reflecting your style and personality.
Covering damage: If your backpack has any holes or damage, sewing on a patch can help to cover it up and extend the life of your bag.
DIY projects: Knowing how to sew a patch on a backpack can be helpful for anyone who enjoys DIY projects and wants to customize their belongings.
Personal touch: Sewing on a patch allows you to add your personal touch to your backpack, making it stand out.
Secure attachment: By learning how to sew a patch on correctly, you can ensure that it is securely attached and will withstand the wear and tear of everyday use.
Repairs: Sewing on a patch can also be a practical way to repair any damage to your backpack, saving you money on buying a new one.
Tools needed to stitch a patch.
1. Needle, Thread
2. Patch
3. Scissors
4. Thimble (optional but helpful for protecting fingers)
5. Pins
6. Seam ripper (if removing old stitching)
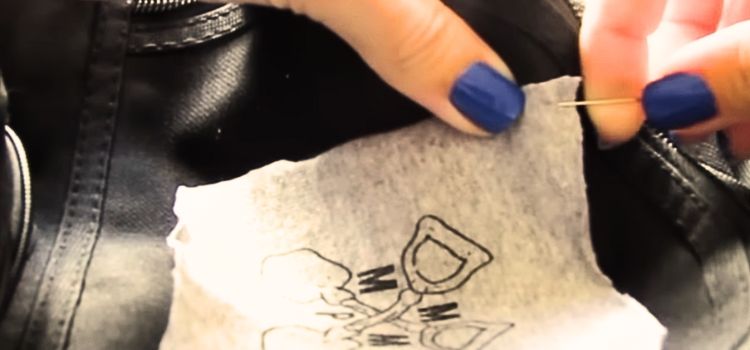
Step 1: Position the patch on the backpack.
First, decide where you want to place the patch on your backpack. Choosing a flat spot free from seams or pockets is essential. Once you have selected the perfect location, use pins to secure the patch so it doesn’t move while sewing. Make sure the patch is centred and straight before you start sewing. Then, thread a needle with a strong, durable thread that is the same shade as the patch.
Step 2: After passing the needle through, knot the end.
- Start by selecting a strong, durable thread that matches the colour of the patch you want to sew on.
- Cut a length of thread that is about 18-24 inches long. It’s better to have too much thread than too little, so feel free to cut more than you think you’ll need.
- Thread one end of the thread through the eye of the needle and pull it through until the ends are even. Make sure to tie a knot at the end of the thread to secure it in place. Knot the doubled thread at the end to make it even more secure.
- To tie a knot at the end of the thread, hold the end of the thread between your thumb and index finger. Then, wrap the thread around your finger twice and roll the loops off your finger, pinching the loops between your thumb and index finger to form a knot at the end of the thread.
- Once you have tied a knot at the end of the thread, you can start sewing the patch onto your backpack. Remember to begin inside the backpack and work your way out to ensure a neat finish.
Step 3: Mix the patch onto the backpack using a straight stitch or a whipstitch.
- Start by choosing the patch you want to sew onto your backpack. Make sure it is the right size and shape for the backpack area where you want to place it.
- Position the patch on the backpack and pin it in place to keep it secure while you sew. Make sure it is centred and straight.
- To thread a needle, use a strong thread that complements the patch’s colour. You can sew the patch onto the backpack using a straight stitch or a whipstitch.
- Begin sewing the patch onto the backpack, starting at one corner. If you use a straight stitch, sew along the edge of the patch, making tiny, even stitches. If you use a whipstitch, sew around the edge of the patch, looping the thread through the backpack fabric and the patch.
- Continue sewing around the entire edge of the patch, making sure to keep the stitches even and secure. If you use a straight stitch, tie off the thread at the end to secure it. If you use a whipstitch, you can ensure the thread by weaving it through the stitches on the back of the patch.
- After firmly sewing the patch onto the bag, cut off any extra thread and remove the pins.
Step 4: Secure the thread and trim any excess.
- After sewing the patch onto your backpack, secure the thread by making a knot at the end of the stitching. It will ensure that the thread doesn’t come loose over time.
- To make a knot, bring the needle under the last stitch on the thread around the needle two or three times around the back of the cloth. Then, pull the needle through the wrapped thread to create a secure knot.
- Once the knot is in place, trim any excess thread using scissors. Be careful not to cut the fabric or any stitches while doing this.
- Trimming the excess thread close to the fabric is essential to give your patch a neat finish.
Admire your handiwork and enjoy your personalized backpack!
Learning how to sew a patch on a backpack can be a fun and rewarding DIY project. It allows you to personalize and customize your favourite bag, giving it a unique look that sets it apart. Adding a patch can also help cover any wear and tear, giving your backpack a fresh and new look. By mastering this skill, you can ensure that your patch is securely attached and will last for a long time. It’s a great way to show off your creativity and add a personal touch to your belongings.
DIY projects
DIY projects are a great way to express creativity and personalize your belongings. Whether refurbishing old furniture, creating homemade decor, or making clothing, DIY projects have many possibilities. DIY projects allow you to showcase your unique style;
however, recycling items that otherwise may have been thrown away can also help you save money and reduce waste. From small crafts to more extensive home improvement projects, DIY allows you to take control of your surroundings and make them your own. Plus, finishing a DIY project gives you a satisfying sense of success DIY project is gratifying. So, roll up your sleeves and get ready to unleash your creativity with exciting DIY projects!
Conclusion:
In conclusion, knowing how to sew a patch on a backpack is valuable for personalizing and repairing your favourite bag. Whether you want to add a unique touch or cover up damage, sewing on a patch can help extend the life of your backpack. By mastering this skill, you can ensure the patch is securely attached and withstand everyday use. So, take the time to learn how to sew a patch on your backpack and enjoy the personalized and durable result.
FAQ
What supplies do I need to sew a patch on a backpack?
A needle, thread, and patch are required. You want to attach a thimble to protect your fingers from the needle.
What type of thread should I use?
Choosing a strong, long-lasting thread that complements the colour of your backpack and patch is advisable.
How do I sew the patch on securely?
Start by securing the patch with tiny stitches around the edges. Then, sew back and forth through the patch and the backpack fabric to create a secure attachment.
Should I reinforce the patch with additional stitching?
Yes, adding extra stitching around the patch’s edges is a good idea to ensure it stays in place, mainly if there will be a lot of wear and tear on the backpack.
Do you have any tips for sewing a patch on a thick backpack material?
Use a thimble to help push the needle through the thick material, and consider using a stronger needle to handle the thickness.
Can I use a sewing machine to make a patch for a backpack?
You can stitch a patch on with a sewing machine, but it may be easier to do it by hand, especially if the backpack material is thick or awkward enough to maneuver under the sewing machine’s foot.
As an Amazon Associate, I earn from qualifying purchases
Leave a Reply